Tuesday, May 19, 2015

Got Camber/Alignment Issues?

One of the most common things we hear from 2007 to Present model Silverado/Sierra owners is "Why do I keep going thru tires?" and " Why does my wheel bow in/out?"

What is camber?

Camber is the tilting of the wheels from the vertical when viewed from the front of the vehicle. When the wheels tilt outward at the top, the camber is positive (+). When the wheel tilts inward at the top, the camber is negative (-). The amount of tilt is measured in degrees from the vertical. Camber settings influence the directional control and the tire wear.

Too much positive camber will result in premature wear on the outside of the tire and cause excessive wear on the suspension parts.

Too much negative camber will result in premature wear on the inside of the tire and cause excessive wear on the suspension parts.

Unequal side-to-side camber of 1° or more will cause the vehicle to pull or lead to the side with the most positive camber.


Now that you have an idea of how camber works let's talk about how to fix it.

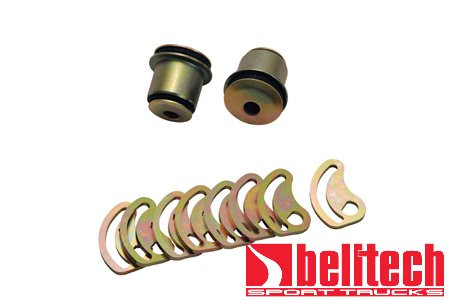
Belltech offers a 2* Camber Bushing Set (Part Number.4955) This kit includes (4) Upper Control Arm Offset Bushings.


You will need to press out your OE bushings and press in the new Belltech bushings. With the correct tools and patience this should take roughly about a hour and half or so to complete.

Here is a link to Belltech install notes if you want to read more on how to install

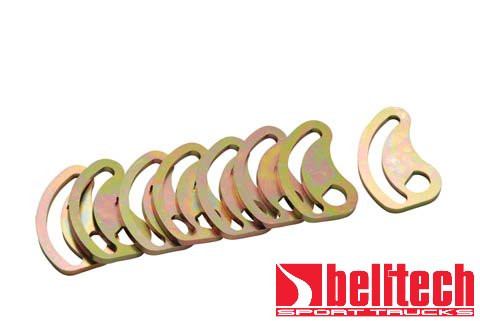
If you are still off on your alignment don't worry. Belltech also offers a 1* Cam Lock Plate Kit (Part Number 4951). You will need to remove the factory plate, elongate the opening and install the Belltech cam plate. With patience it should take about 45 mins or so.


Here is a link to Belltech install notes if you want to read more on how to install

You can also purchase the bushings and cam plates together with Part Number 4957


Here are a few examples of Kris' truck. This truck was lowered with about 4,000 miles on it. Now there is roughly 30,000 miles. Same suspension, wheels and tires. No rotation of tires either. There is roughly 80 % life left in these Falken Tires.


This truck is being the following components:


Tuesday, March 11, 2014

How to measure shocks

It's a pain in the butt trying to buy shocks for a truck/suv you bought lowered. Not knowing how much the truck is dropped makes buying shocks a difficult task. This how to will also be helpful for the trucks that have air suspension or running a super low static drop.

MEASURING POINTS FOR SHOCK ABSORBERS
measure1
Measuring points differ based on the mounting style. Extended and Compressed lengths are measured:
  1. From center of eyering to shoulder of stud
  2. From center of eyering to center of eyering
  3. From shoulder of stud to shoulder of stud
Once you have the measurements give us a call and we can help select a part number that will work. If you already know how much your truck is lowered CLICK HERE to find the part numbers you will need by Belltech.

*This is courtesy of KYB Americas website. We do not take credit for the images or text above.

Thursday, February 27, 2014

How To Measure for Wheel Spacers

Another question we get often from our coilover customers is " Which wheel spacers do I need? " This is another question we tend to back away from. Here is why: There are too many different wheel combinations. By combinations I mean offset, diameter and etc.

The guys over at H & R have put together a simple HOW TO to know you are ordering the right wheel spacers.

1. Gather Tools
To properly measure your wheel gap you will need a few simple tools:

  • Measuring device with millimeter units
  • Straight edge--Yard stick or similar


2. Check Your Gap

  • Place a straight edge flush with the face of the wheel and tire combination. Make sure the straight edge touches the tire in two spots to keep the straight edge even with the tire.
  • Use the measuring device to measure from the inside of the straight edge to the inner fender lip. (see diagram)
  • Make sure that the measurement is taken at the point where the wheel and tire is closest to the fender. For instance, on a car with a large amount of negative camber the tire and wheel may be closest at the front or rear edge of the fender.


Now that you have wheel spacers do not forget longer wheel bolts. Here is how to measure the bolts:


Here is a video courtesy of H&R

**Note content of this blog post is courtesy of H&R's website. We do not take credit for any of the photos,videos or text of the how to content.

Wednesday, February 26, 2014

How To Properly Measure Vehicle Ride Height

We often get the phone call or email saying "I don't know how much I want to lower my ride." The best way to get an idea is to measure.

Here is how to successfully do that:

1) Park your vehicle on a level surface. By doing this you ensure accurate results when getting the vehicle's ride height measurements

2) By using a measuring tape start from the center of the axle hub going straight up to the bottom of the fender lip.

3) Repeat this process for all four sides.


This is also a process we recommend BEFORE you install your lowered/lifted suspension. By having before and after measurements you can know the total actual amount of ride height you have achieved.

Now that you have figured out the ride height for your vehicle you want to know what size wheels and tires will work. We typically won't suggest a size to you unless we have personal experience with the same vehicle and suspension as you.

We do have a niffy tool from the guys over at Discount Tire to use. By using their Tire Dimensions tool you can see what tire size and rim will work. http://www.discounttire.com/dtcs/infoTireMath.dos

Ya we just gave you some homework, but hey look at it this way at least by doing the measurements we can ensure you order the right stuff the first time and will be happy with your new stance.

Wednesday, February 19, 2014

Photoshoot of 2013 Chevy Silverado Reg Cab

After the dust settled from SEMA and the holidays were over we finally had a chance for some photos. We enlisted the help of a local photographer and model. Special thanks to the following sponsors:


  • AVS
  • Budnik Wheels
  • Belltech Sport Trucks
  • Settin Trendz
  • Fresno Unlimited
  • Street Scene Equipment
  • Roadwire Leather Interiors
  • Wilwood Disc Brakes
  • Falken Tires
  • Viair Corp
  • Soundstream Audio
  • Spyder Auto
  • Bedrug
  • Leer
  • TRex Grilles
  • Coverking
  • Airaid
  • Magnaflow Exhaust
  • Dynamite Car Audio Clovis
  • Airlift
  • Optima Batteries


Now for the photos you were waiting for......


Monday, October 28, 2013

Paint & Exterior Goodies!

Now that we have a solid suspension, brakes and engine performance we needed to make sure that the exterior followed suit. Settin Trendz in Fresno, California could not have done a better job. For the exterior a mix of Spyder Auto, Street Scene, Settin Trendz, BedRug, Bushwacker and AVS products were installed.

We dropped off the truck with Jeff at AVS for a bolt in door popper kit and alarm. Jeff installed a bolt in door popper kit (part number TBA), pre wired wiring harness, interior rocker switch and an alarm system. After Jeff was all finished up the truck went over to Settin Trendz to begin the transformation.


Settin Trendz used their own custom made filler plates for the door handles and stake pockets. Adam has designed form fitting end caps to be used with the steel Street Scene rollapn. (Street Scene Part# 950-71128)

After a few days in the hands of Settin Trendz we ended up with this

Here you will find more details of the parts used to achieve this simple and clean look

BedRug Part #BRC07SBK

Bushwacker Tailgate Cap Part #48516

Street Scene Steel Rollpan Part#950-71128
Street Scene Tailgate Handler Relocator Part#950-61131
Spyder Auto Tail Lights Part#5001795

Street Scene Electric Mirrors Part#  950-11960

Street Scene Steel Cowl Hood Part# 950-71129


Street Scene Billet Grille Upper Part# 950-80176
Street Scene Billet Grille Bumper Part# 950-80177
Spyder Auto Headlights Part# 5033871

Budnik Billet 22" Tungsten 6 Wheels

Wednesday, October 23, 2013

Roadwire Interior & Sound Stream Audio

When you drive a lot you want a comfortable interior and some jams. Roadwire was the first company to come to mind when discussing converting our cloth seats over to leather & suede. We decided to go with a Black Leather base with black suede insert topped off with red stitching. After a few hours at Fresno Unlimited for installation we ended up with a perfect result. Note: We didn't use the headrests because we thought it looked bitchin' without.


As you know we bought a WORK TRUCK edition of the Regular Cab Silverado. We couldn't add a Roadwire kit without swapping the vinyl mat to a custom made carpet kit by Fresno Unlimited.


Now on the the tunes. After using Pioneer headunits in the past we picked up a Navigation Touch Screen Pioneer headunit. I picked up a PAC GM29 module to maintain all the factory chimes off eBay for about $25 and a Metra install/wiring harness kit for $20.


Chris and his guys over at Dynamite Car Audio in Clovis, CA were ready to get their hands on the truck to install the goodies we received from Sound Stream. Sound Stream sent us over a 10" subwoofer from their Picasso line.(Part# PCO.10). To power their subwoofer we received a 640 watt amp. (Part #PN5.640D). To finish off the sound system we used a Sound Stream components kit and speakers. Dynamite Car Audio finished off the simple and clean interior by wrapping a custom made speaker box in matching black suede.


Stay tuned for more on the SEMA build!